Create a Paywall
Creating a Paywall in Botsi allows you to display your in-app products in a dynamic storefront that encourages users to subscribe or make a purchase. Paywalls connect Products and Access Levels with the visual experience users see inside your app, and can be customized without requiring app updates.
Use this guide to build and configure your paywall and prepare it for launch.
Requirements
Before creating a Paywall in Botsi, make sure you have created a Product.
To Create a Paywall
-
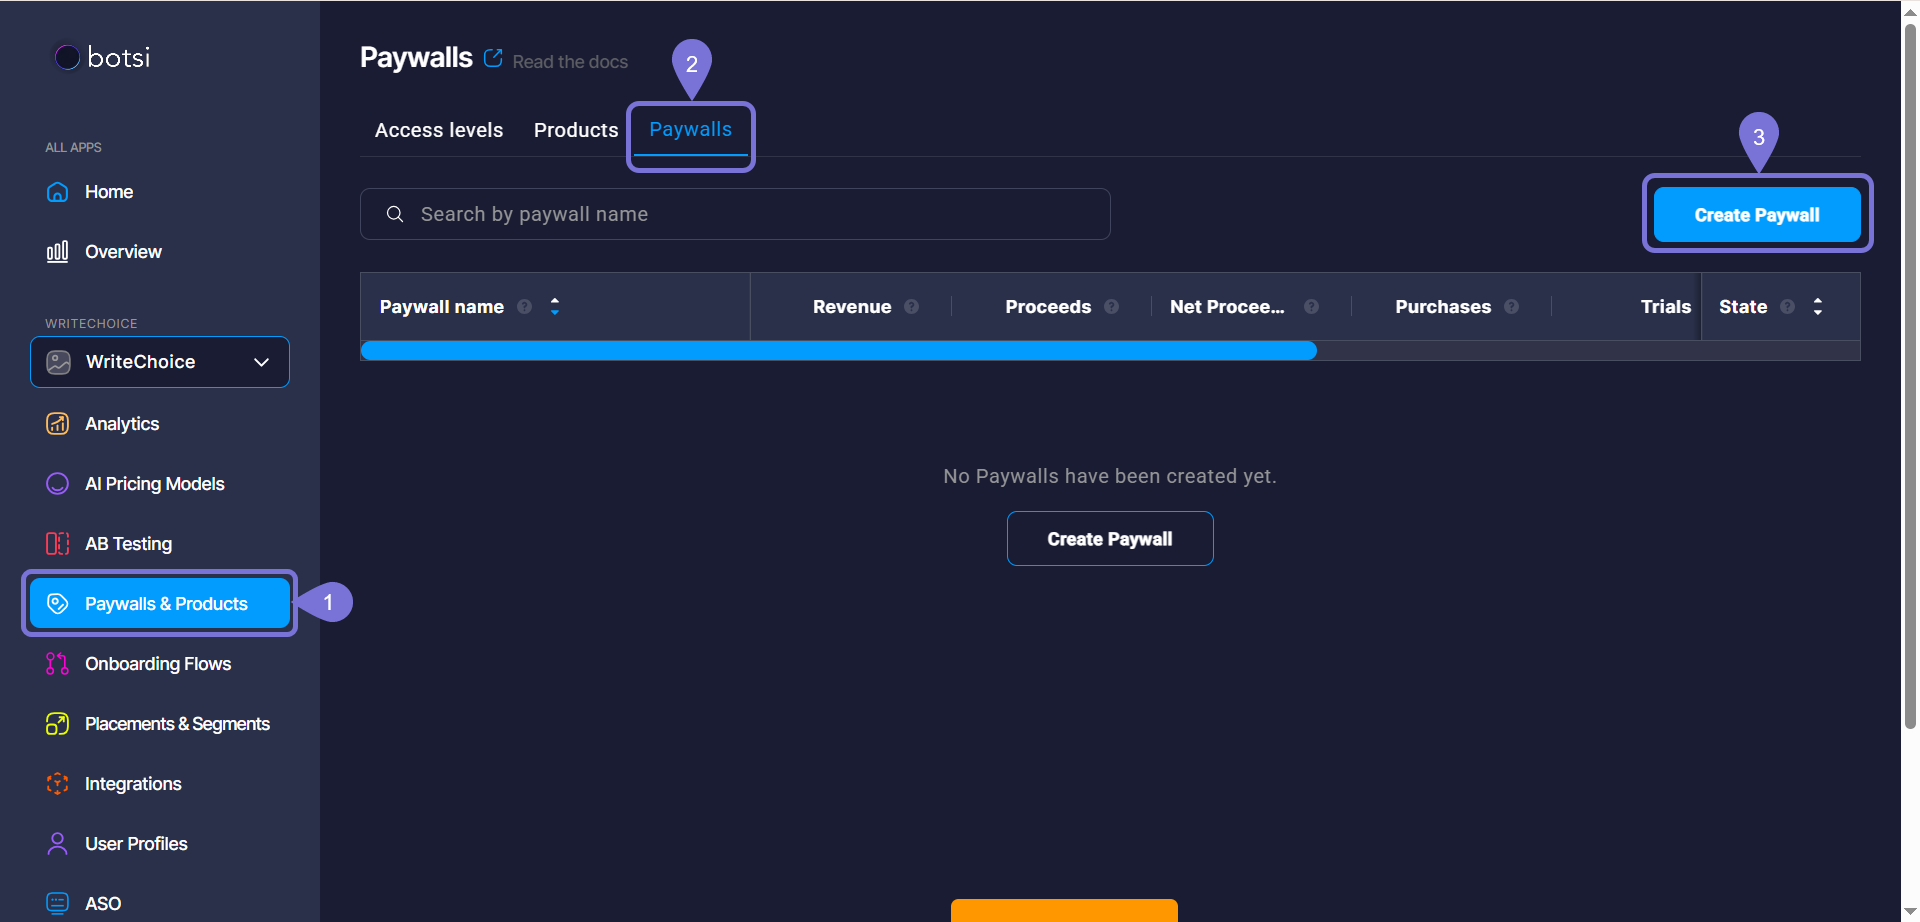
Once logged in, go to Paywalls & Products in the left sidebar.
-
Select the Paywalls tab.
-
Click Create Paywall. A new window will open.
Products tab
-
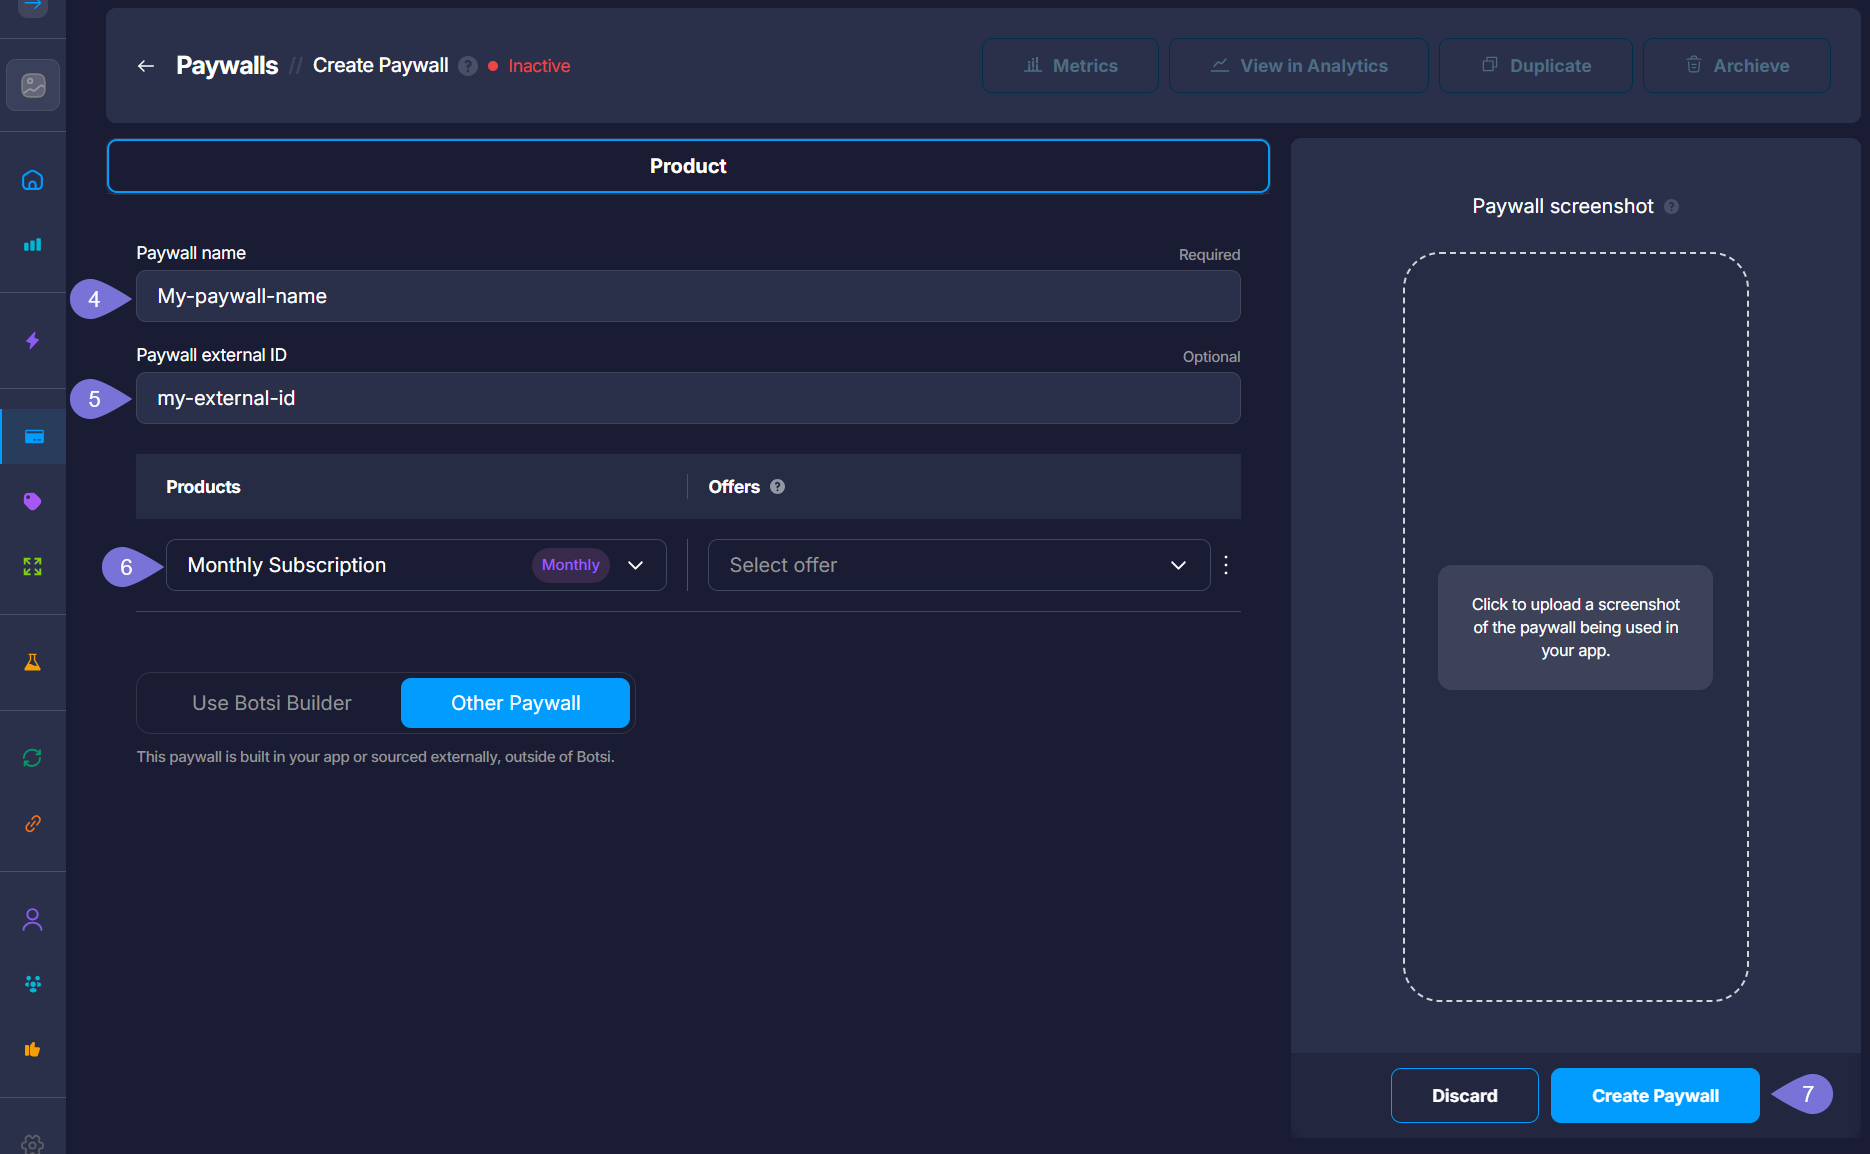
Enter a name for the Paywall.
-
Enter a Paywall external ID.
-
Click Add Product and select one of the previously created Products; (adding an Offer for this Product is optional).
If you your paywall is built in your app or sourced externally, outside of Botsi, select the Other Paywall option.
- Click Create Paywall.
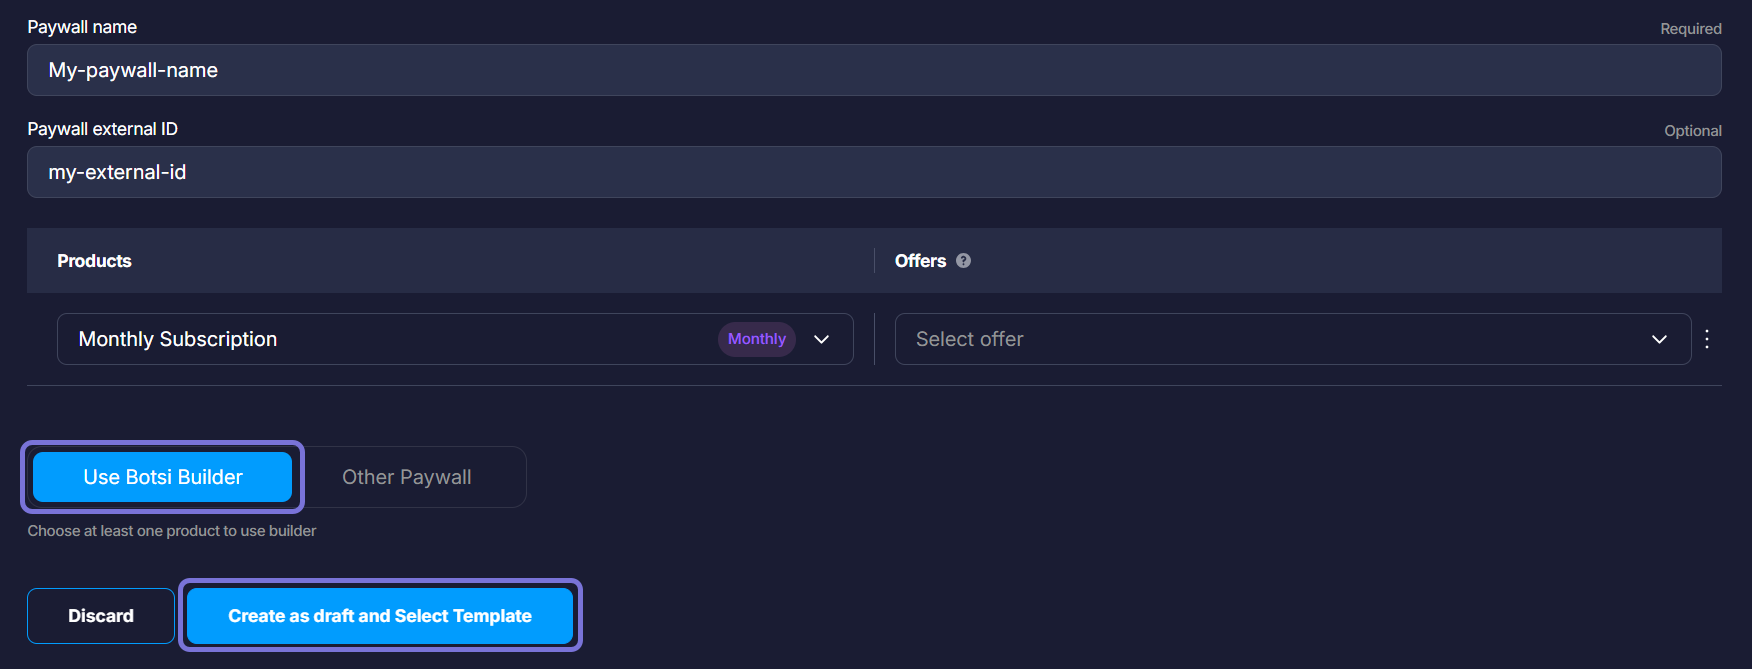
If you decide to use the Botsi Builder editor, select Use Botsi Builder and click on Create Draft and Select Template.
Botsi Builder tab
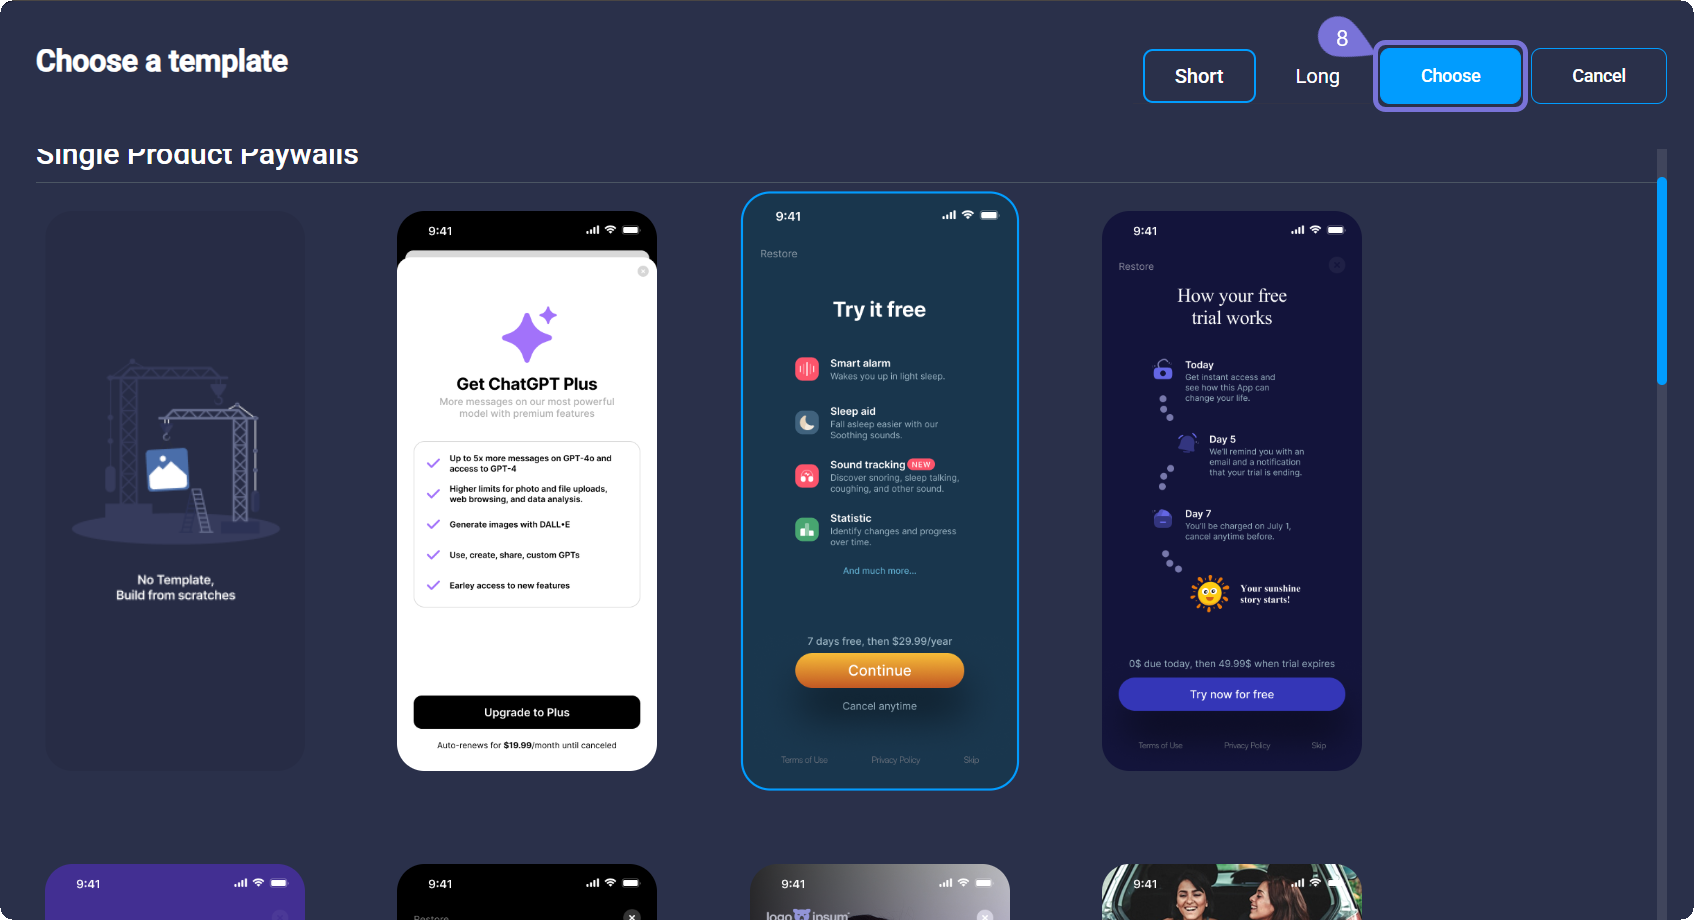
- In the window that opens, select the desired template. Later, you will be able to change it by clicking on Change Template.
-
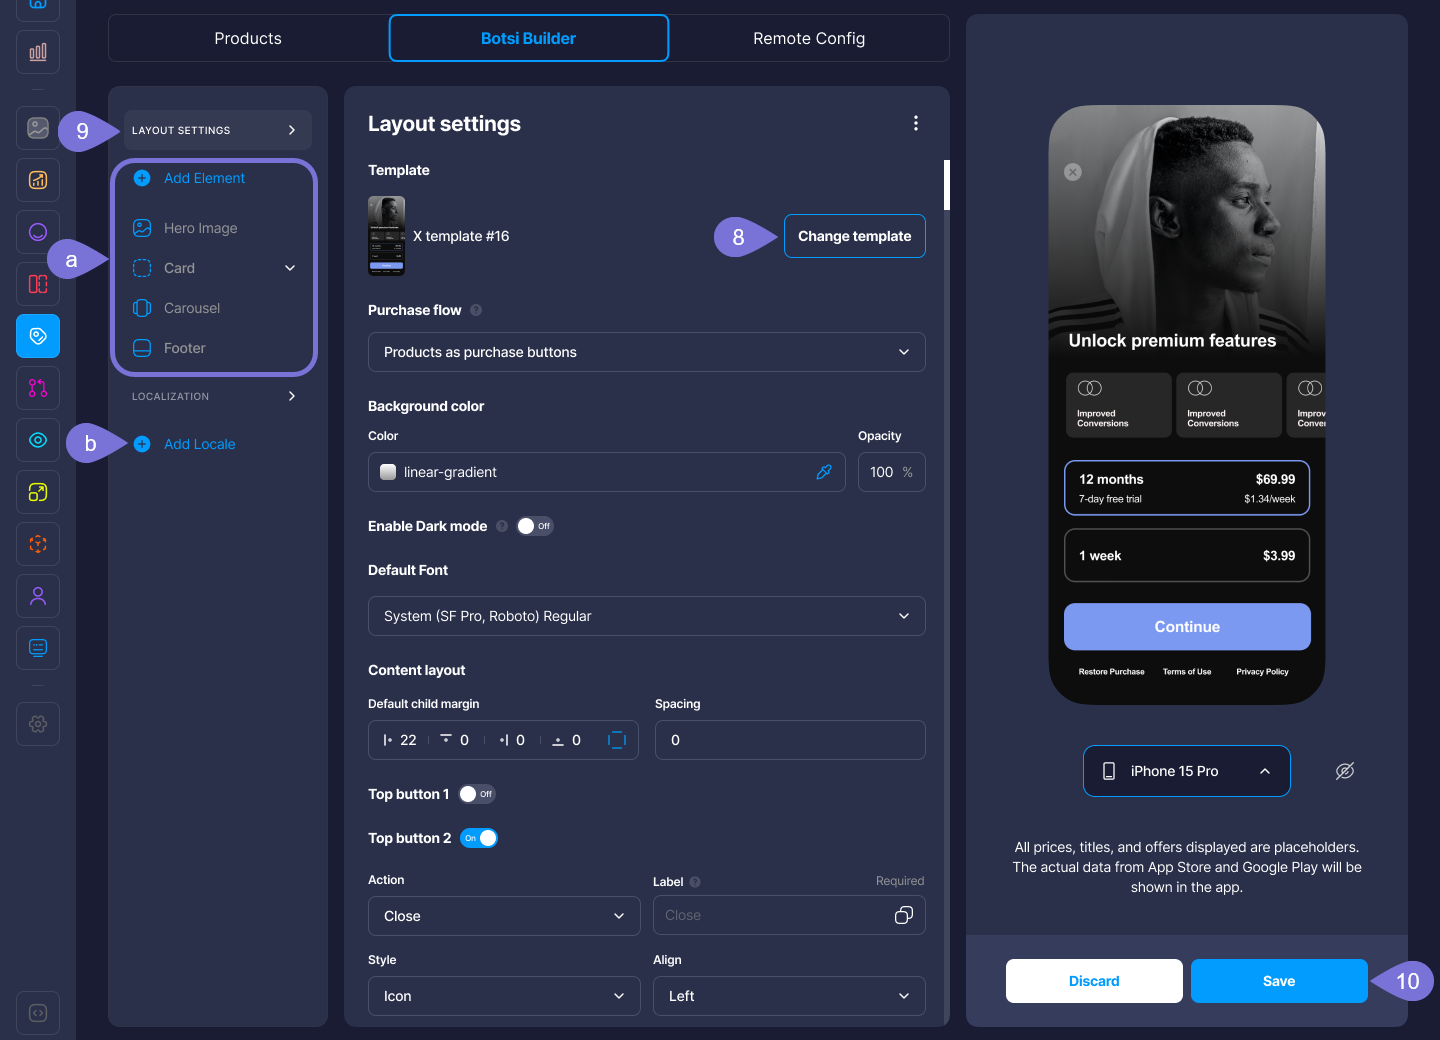
Customize your Paywall using the Botsi Builder Elements. You can:
a. Edit the Layout Settings using the Builder Elements (Hero Image, Card, Carousel, Footer, etc.).
b. Localize the elements of your Paywall to make it available in different languages.
Read the Use the Builder Elements guide to learn more about how each of them works.
- Click Save once you finish creating your Paywall.
Related Articles
For more information, consult the following pages: